
General Installation Overview
Physical Mounting:
The GenMega Onyx-W includes a steel bracket that is designed to be bolted to a wall or a counter-top. The machine includes a bracket plate that is used for either purpose.
For Wall-Mount applications, the installation kit ships with 12 expanding anchors that can be used in drywall or plywood. Review all of the install documents before planning any work and make adjustments based on the intended location and mounting material. Depending on the specific application you should also consider using some lag-screws into available wall studs or anchors if mounting directly to masonry. Be sure to follow any manufactures instructions for the specific mounting material in your application.
Power and Communications:
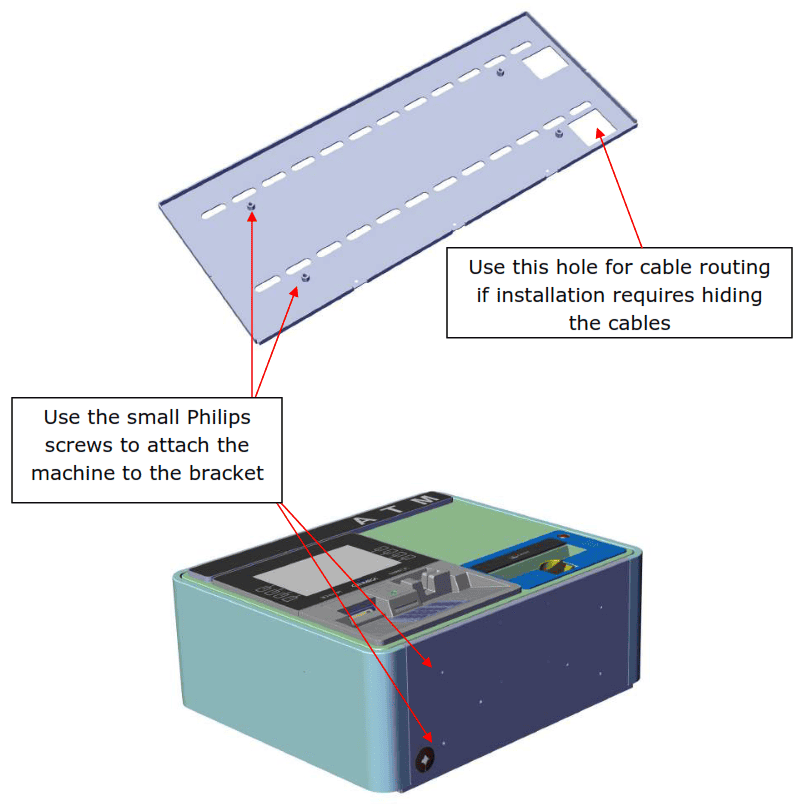
The installation bracket includes a cut-out in the lower left corner so that the power and communication cabling can be routed through the wall (where
available) or countertop for hidden cables. There is also a plugged hole in the bottom of the chassis where the cabling can be run down the wall to the
receptacle. It is highly recommended that you follow all ordinances and building codes when installing your machine.
ADA Height
The Americans with Disabilities (ADA) guidelines require that the ‘uppermost’ control is no more than 48 inches from the ground. This means the top button on the side of the LCD screen cannot be more than 48 inches from the ground. This guideline also requires that you have ‘unobstructed
forward and side access’ to the machine. This means if you have a shelf or other object below the ATM or the ATM is on a counter, there may be more restrictions to mounting.
For more information see:
https://www.ada.gov/regs2010/2010ADAStandards/2010ADAstandards.htm
See section 308.2.1 for reach information.
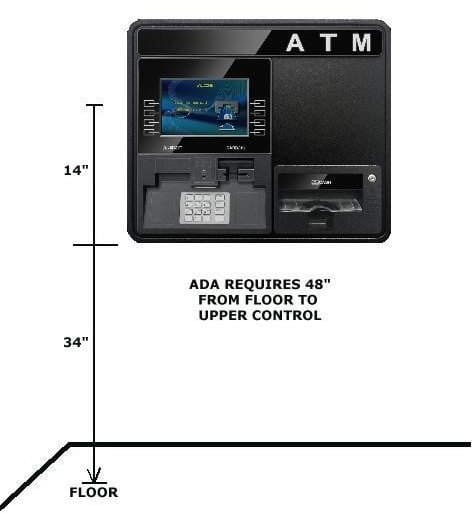
Note the photo above shows an Onyx-W 2K – the Onyx-W 1K has the same height from floor to function keys.
Installing the Wall Mount
The installation kit includes the following hardware:
- 12 Heavy Duty Wall Anchors (Bolts / Washers / Expanding Nuts)
- 8 Screws (ATM to Wall Mount)
Tools:
If using the anchors supplied with the kit, you’ll need to drill 12 holes that are 5/8” in diameter to install the expanding anchors.
- You’ll need a 1/2” socket / nut driver or wrench to secure the anchors.
- You’ll also need a #2 Phillips head screwdriver
Review the installation document and consider any additional tools which may be necessary for your specific location or installation site.
Use the wall mount bracket as a template and mark holes for drilling. The mount uses elongated holes across the top, middle and bottom edges of the mounting plate for the anchor bolts.
The elongated mounting holes provide flexibility to position the bracket. Make sure the bolts are flush when tightened.
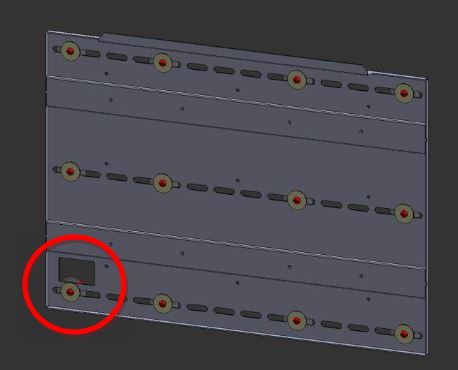
If you are going to route the cables internally through the wall, then you can cut out a section of the wall at this point in the mounting bracket. See red circle above.
Once the bracket is secured to the wall, you’re ready to lift the machine in place. Make sure the door latch is closed before lifting the machine in place.
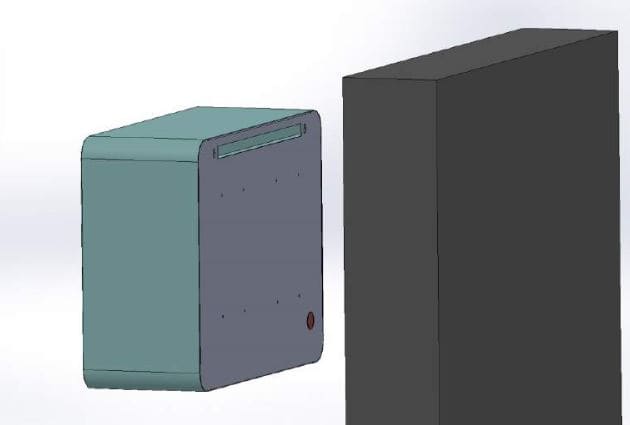
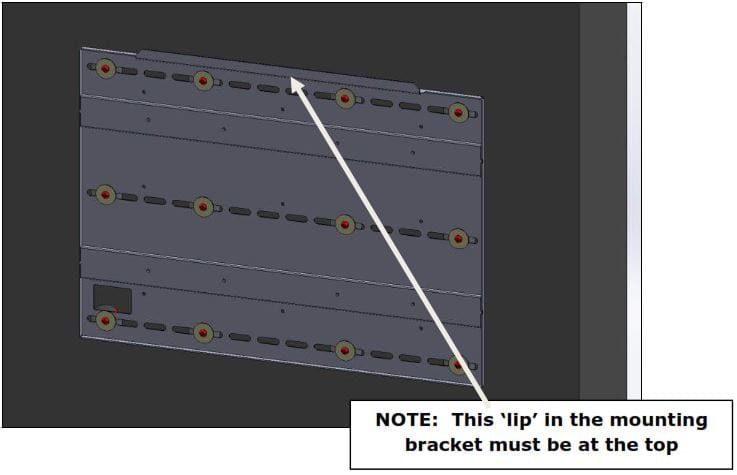
The slot in the back of the Onyx-W fits over the tab at the top of the mounting bracket. This will allow it to hang in place.
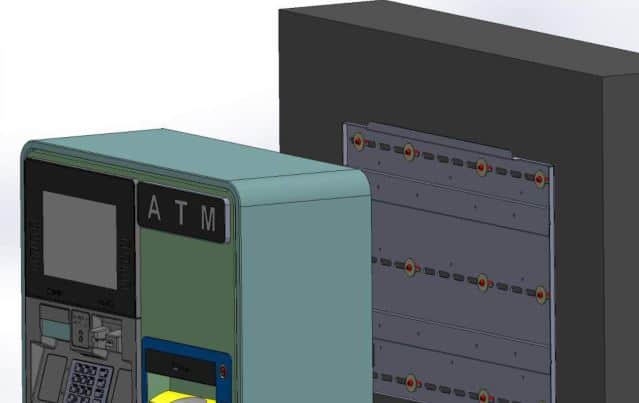
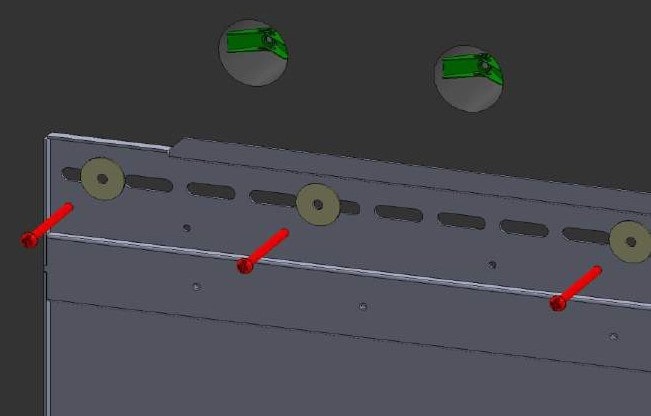
With the machine installed on the mounting bracket, you can now open the front of the machine to access the 8 screws that will be used to secure the machine to the bracket. Open the front door and then rotate the printer assembly out of the way with the green lever. Also drop the ‘vault’ door to access the screw points behind the cassette.
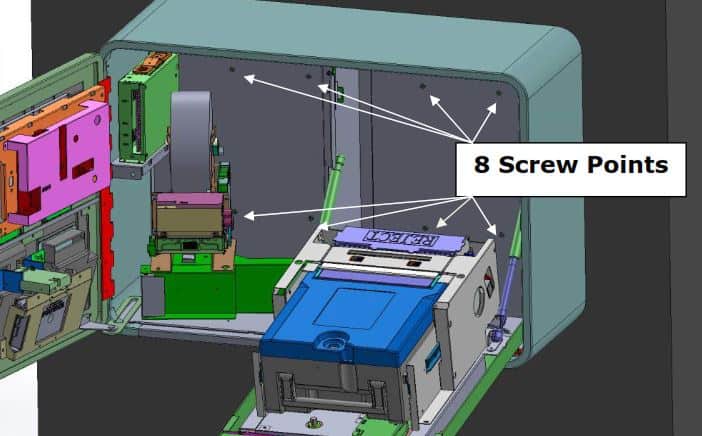
There are 8 screw points in the back of the chassis. It may be necessary to wiggle the machine to get some started. We recommend leaving the screws
loose until they are all started and then tighten. Once the machine is attached to the mounting plate you can close the vault and printer.

If you are running your power and communication cables out the bottom of the chassis, you should now remove the plastic bung from the bottom (behind the printer).
Countertop Installation
The included mounting bracket needs to be split in two pieces before using for a countertop installation. Remove the 3 screws as shown below.
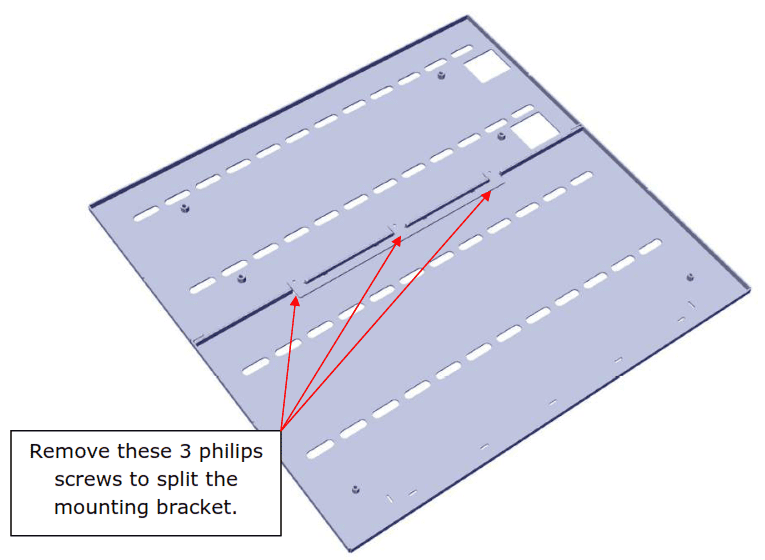
Below is the bracket used for mounting on countertops. There are several screw holes you can use to secure the machine to the top of the bracket. Then use the long slotted holes to mount the bracket to the counter. The square cut outs for cables should align with the bottom of the Onyx-W or you can route the cables out the back.
You will need to open the machine and swing out the printer to access 2 of these screws – the other 2 are inside the vault, behind the cash dispenser.